Combined Arms Strategies for Team Yankee
by Chris Jackson
Modern combat is designed around the combined arms concept. All branches of the military work in coordination to achieve an effect greater than they would achieve if they worked separately. This concept translates into Flames of War game mechanics, and when a combined arms list is placed into the hands of someone who understands how everything is supposed to work together, only the dice gods can make it fail. In the following paragraphs, I will lay out the concepts you need to understand when you are building your list and how to translate them to the tabletop.
The first thing that you have to do is determine your playing style, and what kind of army fits your personality. People with no patience or finesse will not do well with a West German army. People who don’t handle taking heavy casualties should avoid Warsaw Pact lists. But most of all you should find something you are comfortable with and enjoy.
Every army can be divided up into maneuver elements and support elements. Maneuver elements are those which are designed to move into combat and destroy the enemy. They are characterized by high levels of firepower, high survivability, and good mobility. Main Battle Tanks (MBT), infantry, armored fighting vehicles like Bradleys, BMPs, Marders, and sometimes combat aviation are good examples of maneuver elements. FV432s and M113s are transports that have minimal combat ability but fall under infantry. Support elements are those tasked with a specific type of enemy or that are called on to support the maneuver elements. Air Defense artillery, field artillery, mortars (hereafter referred to as fire support), and sometimes combat aviation, are the examples of support elements.
Maneuver units are used to take/hold ground (secure objectives, yours and your opponent’s) and destroy enemy forces. Fire support units aid in this by firing obscurants (smoke), or reducing return fire by pinning/destroying enemy forces (high explosive/duel purpose improved conventional munition or HE/DPICM). Air defense protects key assets from enemy air assets. Aviation destroys key enemy maneuver elements (read: main battle tanks) or key support elements that are hidden from direct fire by terrain (read: fire support/air defense artillery or ADA). Understanding what each separate unit’s mission is, and more importantly, assigning it one at the beginning of a game, is key to keeping focus on critical tasks needed to achieve victory.
 A well-designed NATO list needs three to four maneuver units, fire support, and air defense. At least one of the maneuver units needs to be a strong infantry unit. Infantry holds ground. Without a strong screen of infantry to keep the enemy from maneuvering to your flank, the strongest MBT company will fall to vehicles getting the inevitable flank shots on weak-side armor. Your MBTs are your killers. One to two platoons of MBTs with Front Armor 17/18 will enforce a six to twelve combat vehicle tax on a Warsaw Pact formation per turn. Few formations can sustain this for very long, and once the combat vehicles of the formation are destroyed, dug-in infantry can be forced out of position by Chobham armored tanks with virtual impunity. Add in fire support and infantry support. It can be done without assaulting by just pounding the position until it is combat ineffective.
My most effective 100 point NATO unit build was the following, a West German two-formation force built around a Leopard 2 Company and a Panzergrenadier Company:
West German (100 points)
Formation 1 (65 points)
- HQ – Leopard 2
- 3x Leopard 2
- Marder Panzergrenadier Zug (Full)
- 4x Gepards
- 4x Fliegerfaust
Formation 2 (29 points)
- HQ – M113 Panzergrenadier
- M113 Panzergrenadier Zug (Full)
- M113 Panzergrenadier Zug (Full)
- 3x Leopard 1
- Panzermorser Zug
- 2x Luchs Spah
- 2x Luchs Spah
Support (6 points)
- 4x Rolands
This list is primarily oriented towards defensive missions. I can place 2 infantry units on the board with the Leo-2s in ambush. Depending on the aviation threat, I can place either two ADA units on board or an Infantry unit and the mortars, or any mix thereof. From turn one, I am throwing 8x Anti Tank 21 and 8x Anti Tank 22 shots. That will quickly rip the heart out of any attacking armor formation, and only slightly less quickly destroy massed BMPs. The available 8x Fire Power 4+ AA missile, 12x Fire Power 5+ missile, and 20x Fire Power 4+ Twin 35mm shots will greatly reduce the effectiveness of any air strikes against my position.
This unit would be equally effective on the attack. The tanks and Milan Teams engage enemy tanks and fighting vehicles at long range until they are destroyed. Infantry moves in closer to take dug-in infantry under fire from beyond their max range to attrit the infantry. Mortars provide a screen of smoke to reduce return fire against the MBTs, then aid the weight of their fires to reducing infantry positions. Once the enemy fighting vehicles are destroyed, the Leo 2s move in to push enemy infantry off of objectives. US Forces can be built along the same lines with the extra points going to more fire support or infantry assets.
 A well-designed Warsaw Pact list needs to be based around a full strength BMP-2 company with all the attachments. It is, in my opinion, the most potent single unit in the game. Whether it is an attachment to a tank formation or motor rifle formation is up to the individual player, but regardless of what it is a part of, it is the foundation of a successful list, as it was in the real world. Soviet doctrine was based on the power of the infantry fighting vehicle they pioneered. Whether the rest of the force is MBTs, more BMPs, or BTRs there needs to be some reliable way to deal with NATO MBTs. This can be achieved either through a sufficiency of AT-5 Spandrel Missiles, (read: tons of BMP-2s), lots of MBTs, or air assets is up to the individual. But when building your list, you need to ask yourself “How will I kill Abrams, Leo 2s, and Chieftains?” And your answer should be, “With these guys AND these guys.” Redundancy is key. Your opponent knows the stats, too, and will focus fire on that ONE asset until it’s gone, so make it a little tougher, bring at least two.
If you decide to use Hinds or SU-25s to accomplish this, then you should dedicate at least ten points of your force to fire support. Use the artillery to pin enemy ADA prior to bringing in aviation assets to minimize antiaircraft fire and preserve them. Prioritize unarmored ADA because a single hit will pin, and therefore shut down, the entire unit. But even strikes on armored targets are worthwhile if you can achieve a bail or kill result. For the same reason, NATO players should also bring fire support assets if they have chosen to bring aviation. Fire the SEAD missions (Suppression of Enemy Air Defense) then bring in your aircraft. Direct fire on units with MANPADS (Man-Packed Air Defense Systems) to pin those systems and on any ADA assets in view by all friendly forces that can have effect. Indirect fire by any fire support units that can range will protect your aircraft and give them the chance to shoot this turn and come back for more later.
An effective Soviet build would be a two formation force built around the BMP Motor Rifle Battalion and a BTR Motor Rifle Battalion:
USSR (100 points)
Formation 1 (48 points)
- HQ
- Motor Rifle w/ BMP-2 (Full)
- Motor Rifle w/ BMP-1 (Minimum)
- SA-13
- 2x BRDM-2 Recon
- 3x 2S1 Battery
Formation 2 (37 points)
- HQ
- BTR (Minimum plus 2x Spigot Missile Teams & Gremlin AA Team)
- BTR (Minimum plus 2x Spigot Missile Teams & Gremlin AA Team)
- 3x T64 w/ AT8
- 2x BRDM-2 Recon
Support (15 points)
- 4x Hind D
- 3x BM-21
- BMP-OP
Place the objectives where he has to expose himself to defend them, set up a firing line of BMPs to destroy or at least attrit the forces on it and send the infantry in as a huge unstoppable wave to overrun the defenders. Set up the ground mounted AT to destroy light armor and prevent shifting vehicles from one objective to the other, and go to town. The average player, when faced with such a plethora of targets, will shut down mentally, roll over on his back, and start twitching.
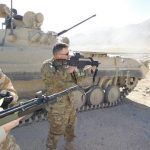
Chris Jackson is a retired army major. He served 20 years, of which 42 months were spent in a combat zone. He has been playing Flames of War since 2006 and Team Yankee since it was released. He plays whenever and wherever he can get a game going. (Pic – Chris in Afghanistan shooting a G36K next to a Czech Republic BMP2)
Chris Jackson’s gaming accomplishments:
- 2017 Flames of War Masters Champion
- 2017 Flames of War Europe Team Championship – Team USA, 3rd Place
- 2016 Flames of War Europe Team Championship – Team USA, 2nd Place
- 2016 Flames of War Southern National Champion (Late War)
- 2015 Flames of War Europe Team Championship – Team USA, 1st Place
- 2015 Flames of War East Coast National Champion (Early War)
- 2014 Flames of War Europe Team Championship – Team USA, 2nd Place
- 2013 Flames of War Wolfkrieg Champion
- Five-time North America Masters player
6 Replies to “Combined Arms Strategies for Team Yankee”
Great article, really good information, will be trying to find the best way to use this information in my list building.
Great article, Chris! Thanks for writing it!! Now to put these ideas to practice.
Carl
A great primer for success in Team Yankee. Thx Chris!
Well that west German list is different from the one I’ve run & seen others use. More infantry for a start. How would you go about building for lower point levels, less Leo 2s & more Leo 1?
I avoid the Leo1 altogether. It is too much of a glass cannon for my tastes. I’m bringing Leo2s down to around 70 points. At the current level of 64, I will be running two infantry companies, one with 113, one with Marder, and plussing up the support units in the hopes I can use the artillery to root out any dug in WP troops
Four years later .. Still great advice